So how do I use it?
First things first: You'll need to install Tmux if you don't have it on your system already. Thankfully, this is pretty simple. Go check out this link and come back once you're ready.
 tmux
tmuxInstallation Instructions
So now that you have it, just run tmux. You'll see a green bar at the bottom that will show you some information on tmux about your current window and the program among other things.
Let's just dive in and see what we can do with this. To start, you can create a new window by using the default keybindings.
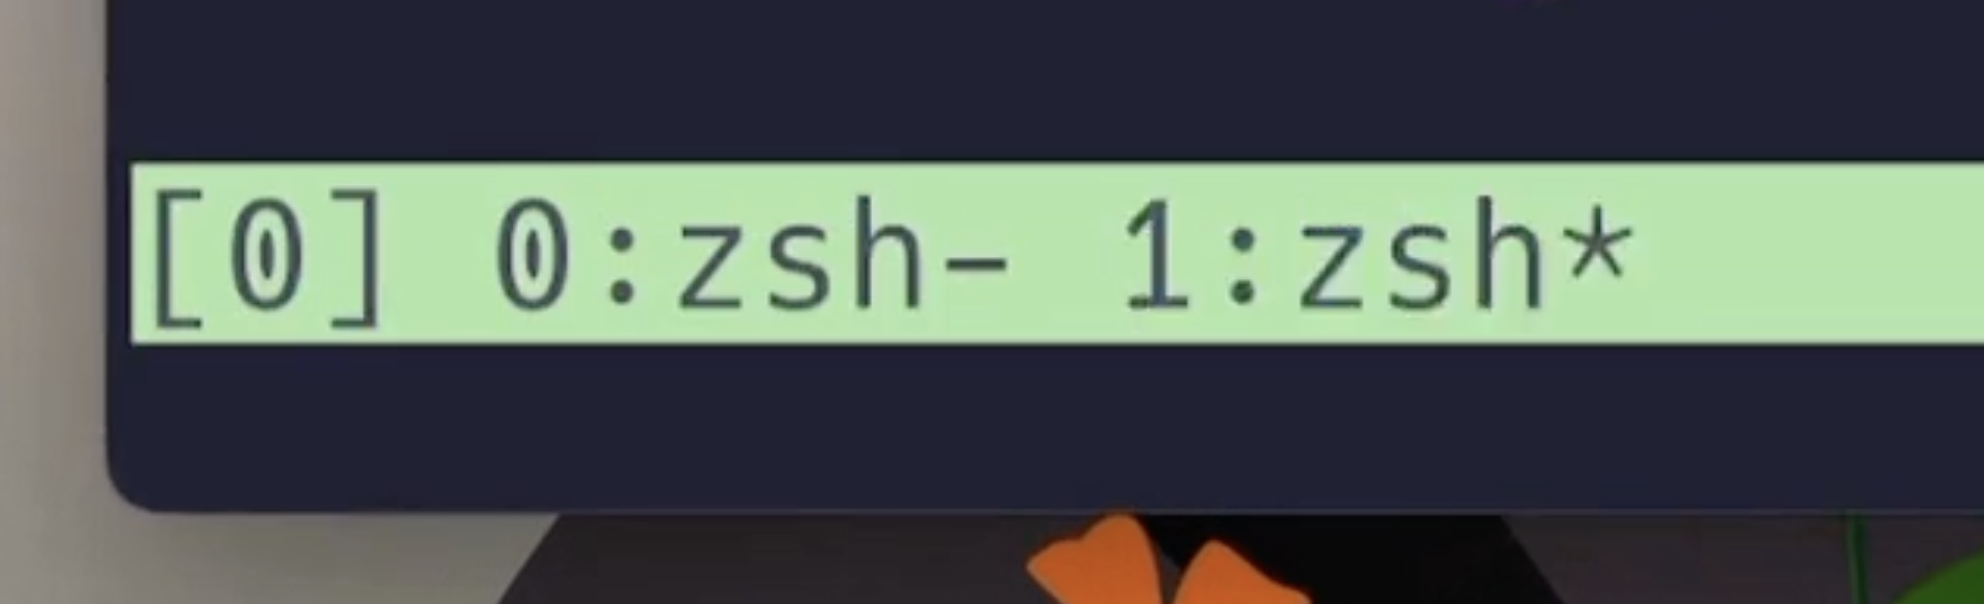
You can tell you have a new window as there will be another item in the green bar at the bottom of the screen. Here, you'll see it as window 1 — cause 0-indexing.
So now that we're on this new window, how do we navigate these?
To cycle between windows, you can use (Ctrl+b) + n
To navigate to a specific window, you can also use the number for each (e.g. - (Ctrl+b) + 0 to navigate to window 0.
The important thing is you can tell what window you're on by the * that is next to the program name running in that window.
What about panes?
Windows are great, but what happens if you want to see two different things on the screen at once? That's where window panes come into play.
On any given screen, you can split vertically or horizontally.
(Ctrl+b) + % - vertical split
(Ctrl+b) + " - horizontal split
What's cool about this is that the split happens relative to the pane you're in. So if you've split an entire window vertically and then horizontally, you'll end up with something like this.

To navigate between these panes (with the default configs), you can use the default leader key (Ctrl+b) and your arrow keys.
If you have enough windows though, it's hard to keep them straight. Tmux solves this by allowing you to rename your windows.
To do this, you need to first enter command mode. This is done by pressing <leader> + : – that is, (Ctrl+b) + :
You'll see on the bottom of your screen where the command will be entered.

Now let's type rename-window api. Now my window is called api.
So now you're done with whatever you were doing for now and you want to detach from the session. You can do this by <leader>+d.
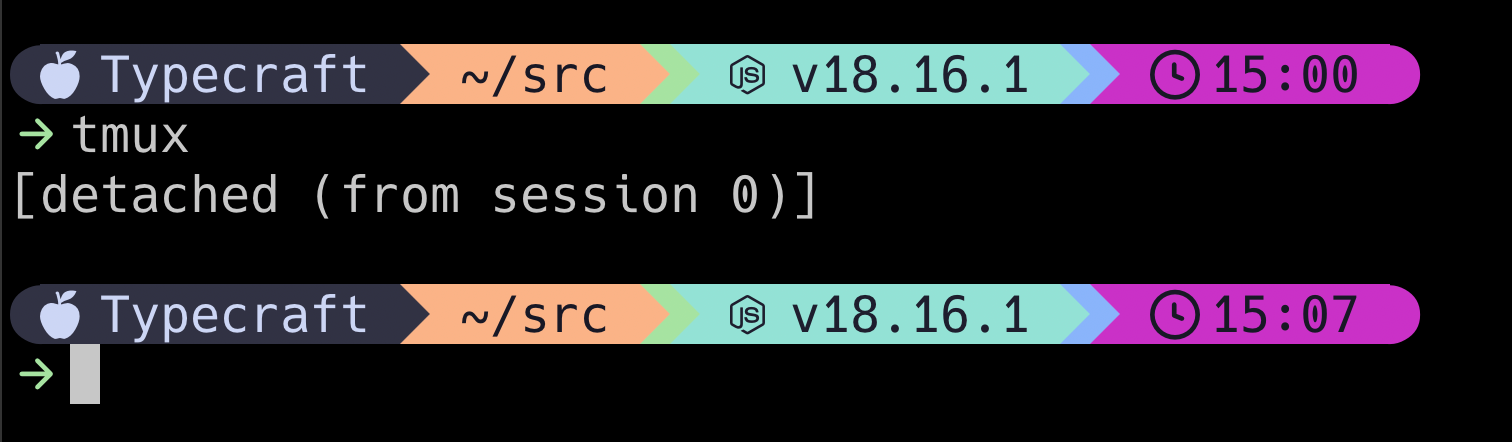
But wait, you forgot something and need to get back to your sessions.
tmux ls will show you what you have open.

I only have one open so I can easily run tmux attach.
That's great and all but what happens if you need more than one session?
That's simple enough. Just detach from your session and type tmux. You'll see here that you're in a brand new session!
From here though, how would you navigate to your old session? That's also made very simple. <leader> + s will list your sessions.
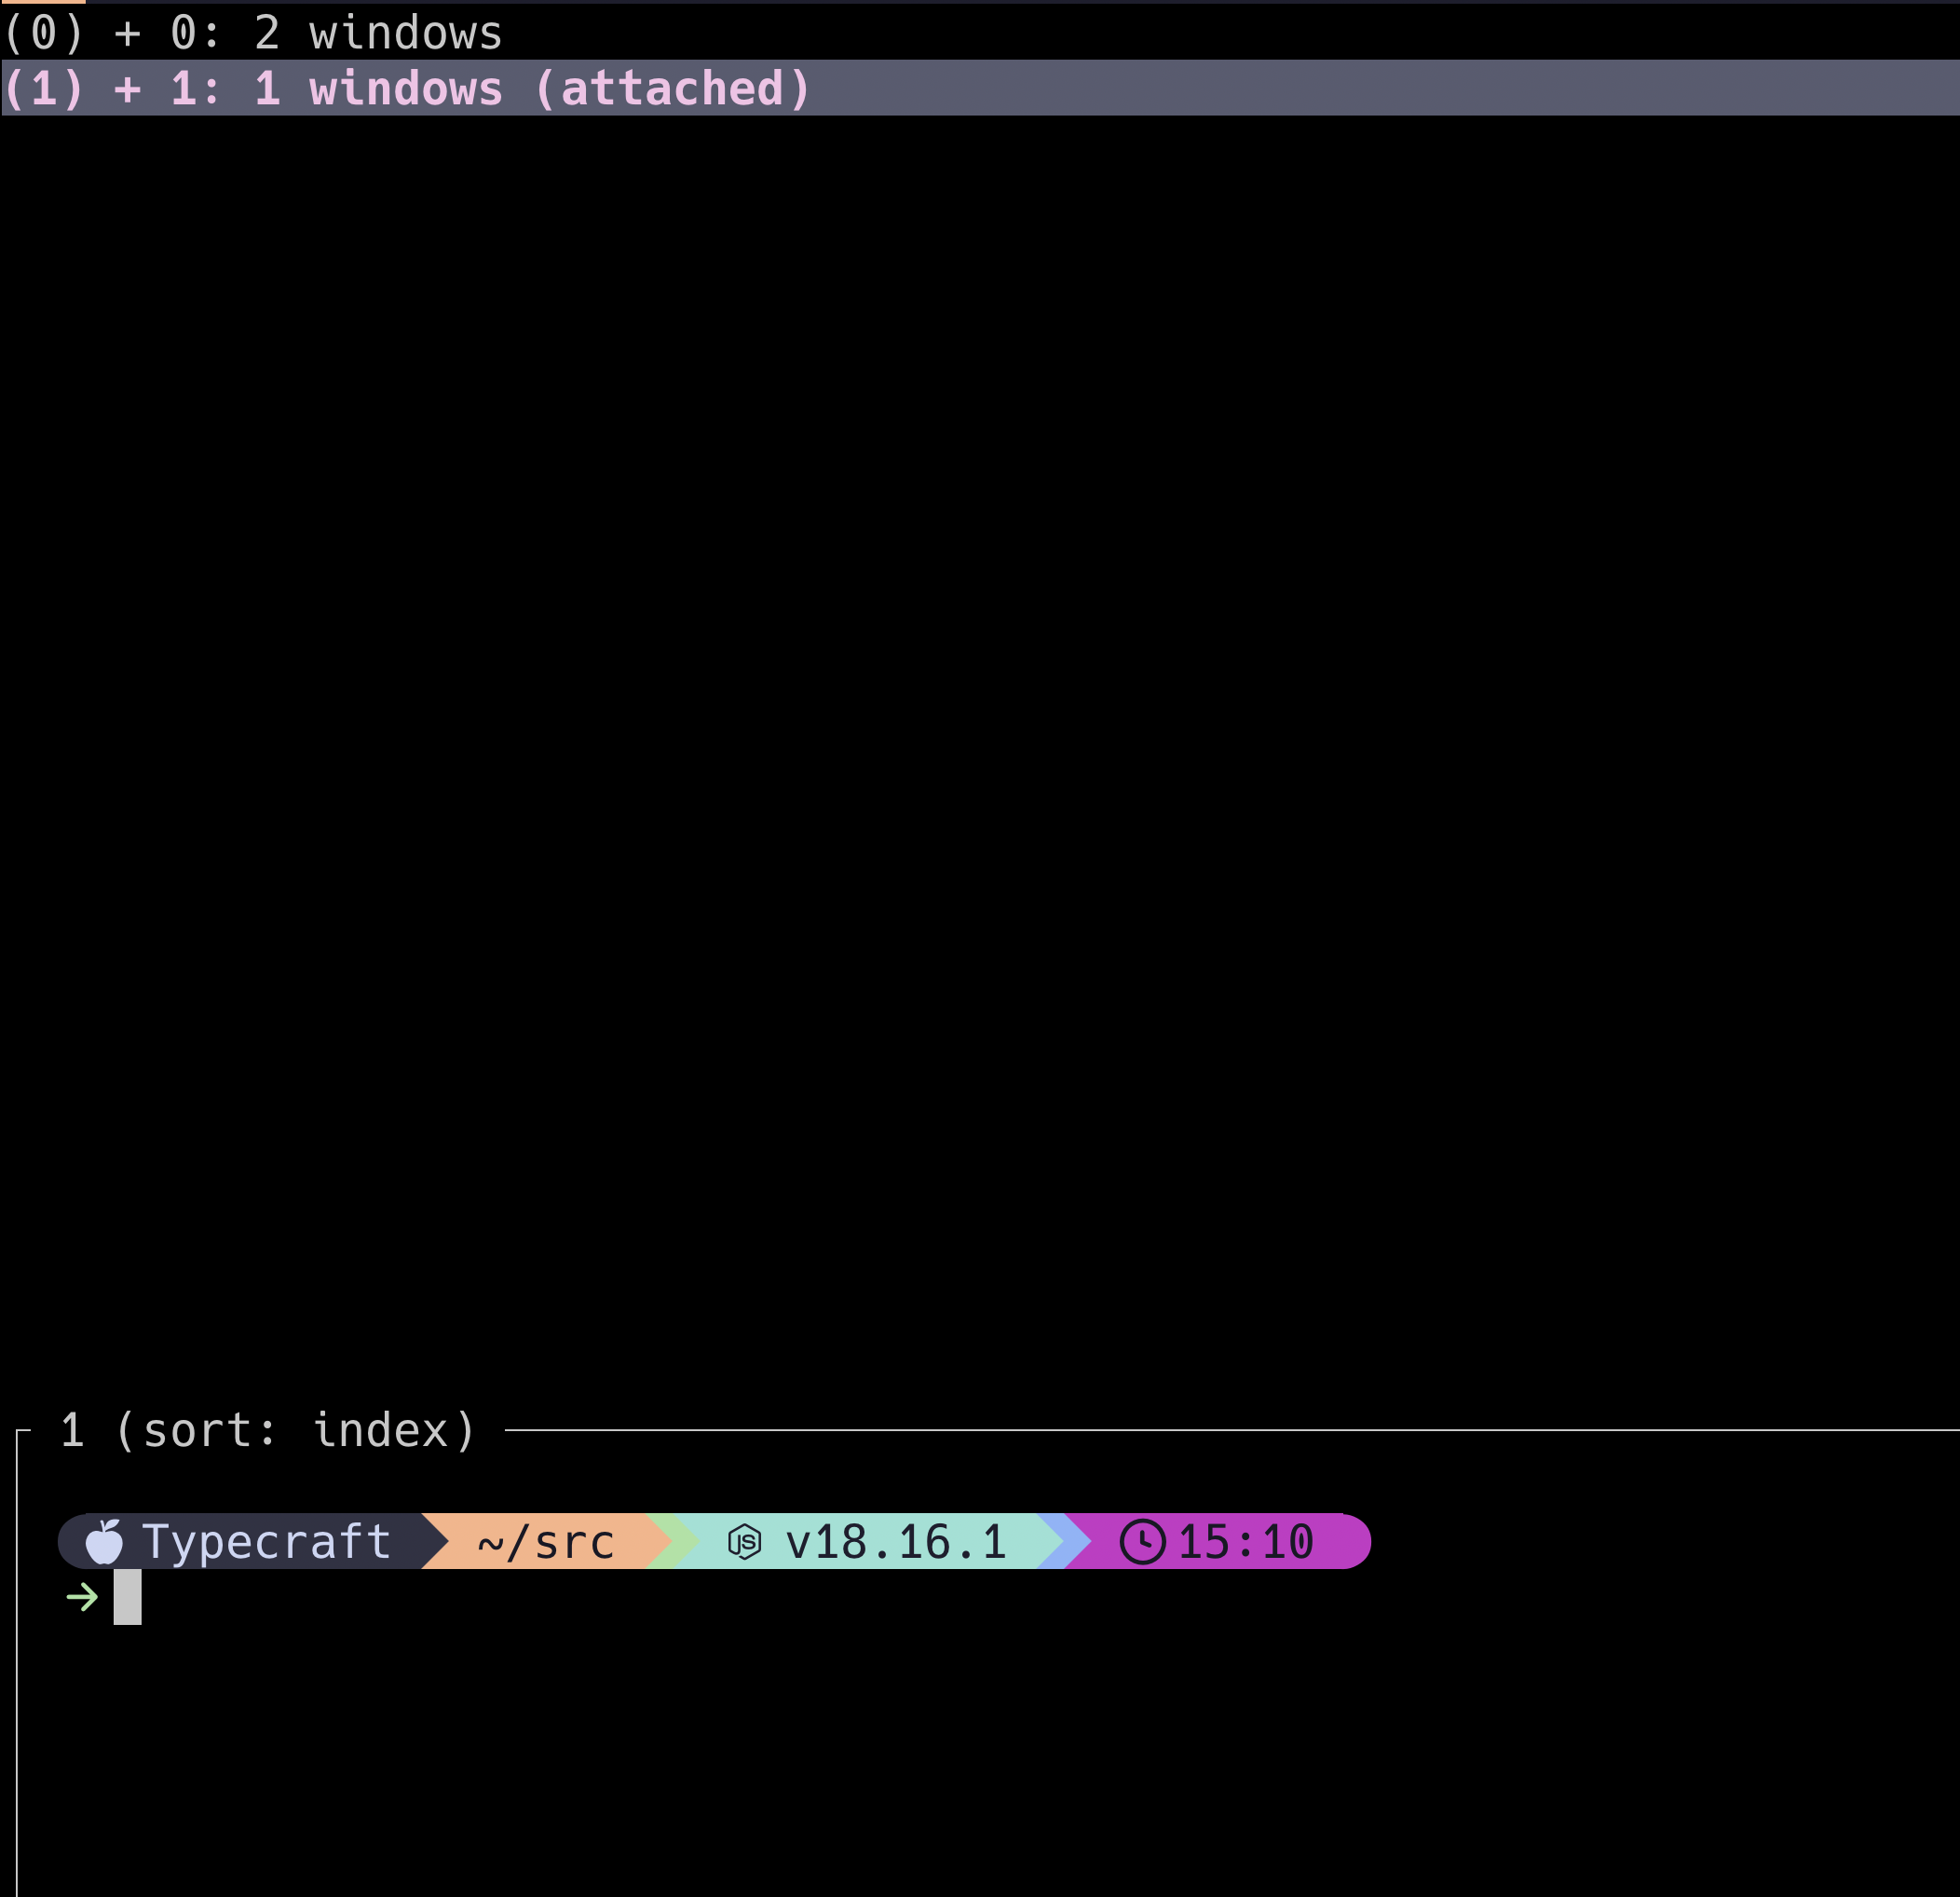
You can simply use your arrow keys to navigate to the session you want to join and press enter. Now we have the same problem we had with windows. Numbers aren't great for remembering what each session is. Let's go about renaming them.
Remember command mode? Press <leader> + : and use the command rename-session api.
Now when I run <leader> + s, I see my sessions named appropriately.

From here, you can test out Tmux in action. You can do this by tailing a log, pinging a server, or maybe running a server in a session. Detach and you'll see the server is still up and running. Rejoin and see the ping has been pinging all along.
Now that you know how it works, you probably want to configure it to be the best version of itself.
That's coming up next!